HubSpot Duplicate Alternate ID Error in Import
If you've ever tried to import a spreadsheet into HubSpot where the same record (be it Contact, Company, Deal, Ticket or a Custom Object Record) is referenced on more than one row, you'll know HubSpot's import tool bouncing back errors and is unable to import the data in anything but the first row the record is referenced.
For example, along with the unique record ID HubSpot automatically assigns each of the CRM records created in your HubSpot database you are able to reference other properties in your import to avoid duplication of records:
- Contact records use the value in the 'Email' property
- Company records use the value in the 'Company domain name' property, and
- All CRM records can use the value in custom properties set with a rule to require a unique value for the property. More information on this linked here.
So, if I was importing this spreadsheet into HubSpot:
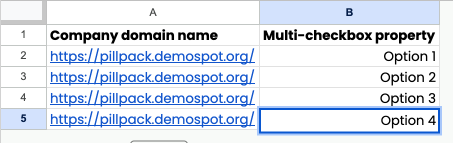
Row 2 would be imported and set the property value of 'Multi-checkbox property' as 'Option 1', but then HubSpot would be unable to import the data in rows 3 -5 as the unique record ID (in this case the Company domain name) had already been used in this import.
The import dashboard would show 'Duplicate Alternate ID' errors for each of these rows:

Using Zapier to get around the HubSpot Duplicate Alternate ID import error
Internally at BabelQuest, we have used Zapier to connect Google Sheets and HubSpot and build out a 'Zap' that enables us to get around this import limitation when importing values into multi-check box properties in HubSpot.
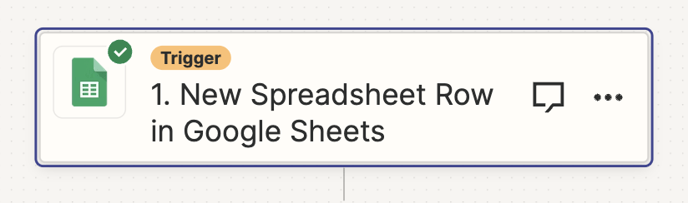
Step 1:
Set step one of your zap as 'New Spreadsheet Row in Google Sheets' (or Microsoft excel if you use that).
In the trigger step of this action select the relevant spreadsheet and worksheet the zap should look to for data - we created a new spreadsheet specifically for this zap.
IMPORTANT: Make sure there is a column in your spreadsheet that is a unique identifier - either a HubSpot default property (Email or Company domain name) or a custom property you've set to require a unique value in your portal.
Step 2:
The second step in the 'Zap' is to instruct Zapier to search your HubSpot portal for an existing record based on the value in the unique identifier column in the spreadsheet, in our example we use the company property 'Company domain name'.
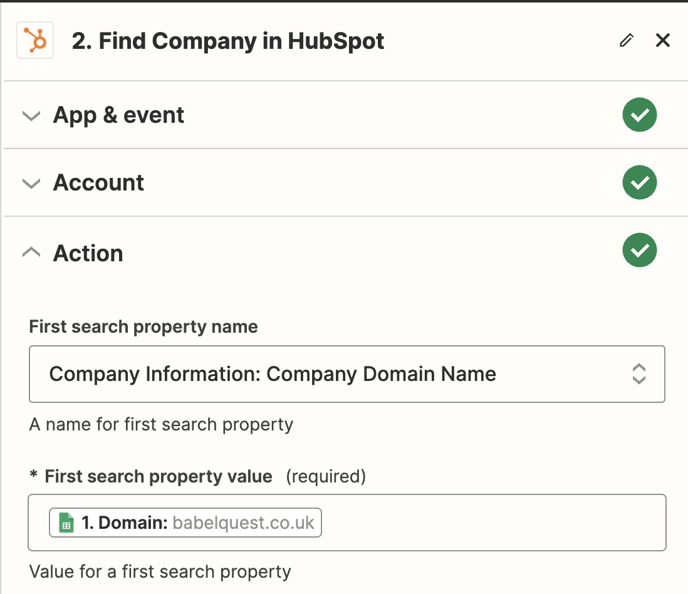
Consider in this action whether or not you want Zapier to create a record in your HubSpot databases for you if Zapier can not find a record with a matching unique ID already in your CRM system.

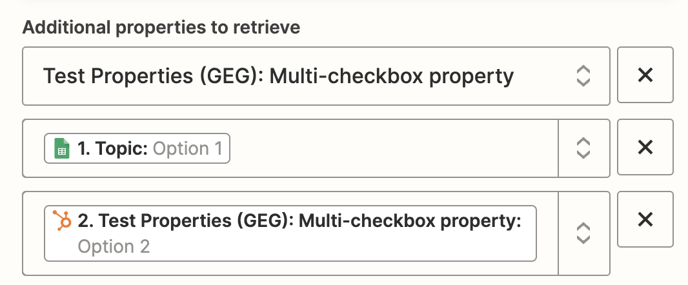
As well as finding the existing CRM record or creating a new record, step 2 is where you will instruct Zapier to get the existing value from your Multi-checkbox property. This is so this value can be used in Step 3...
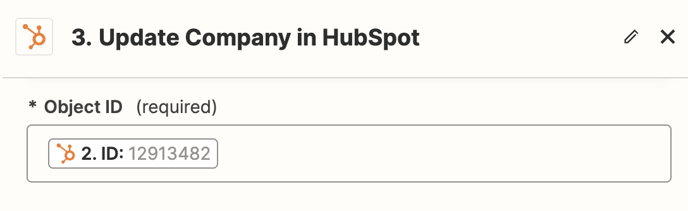
Step 3:
Now you have told Zapier where to find the values you want to add into HubSpot (Step 1) and which record to update with these values (Step 2) you can add a final step to your Zap to action this.
Create an action which is 'Update Company in HubSpot'. Use the value found in Step 2 for Zapier to find the relevant CRM record:
Then update the relevant multi-check box property in your CRM using both the value from the spreadsheet in step 1 and the existing value (if any) in the property found in step 2.
This is so the existing value in the CRM is not overridden each time the 'Zap' runs, and instead the value in each new row is appended to the existing value in the property in HubSpot.

Now all you need to do is turn on your Zap and add rows of data to the spreadsheet you connected in step 1 to trigger it to run and push the data from the spreadsheet into your HubSpot portal!
