Step 1: Connect a domain
You may remember how to connect your domain from when you set up your website and landing pages but for those who need a refresher please follow the steps below:
- Head to Service > Customer Portal
- Click Connect Domain > Primary Domain
- Select Customer Portal
- Enter the domain you'd like to use (Please note if you have a knowledge base you can skip this stage as HubSpot will use this domain)
- Decide and enter on a subdomain e.g www.yourwebsite/portal.co.uk
- Update your DNS records
Step 2: Login and authentication
Before turning on your portal you need to decide on your login and authentication method. You can either require member registration or provision access using single sign-on (SSO). Check out these HubSpot articles to find out which is the correct option for you.
Step 3: Choose the default inbox
HubSpot will ask you to choose a default Inbox for conversations created by contacts in your Customer Portal. This is just for tickets not associated to a conversation in the inbox as most conversations will be routed to an Inbox based on Chatflow, Form, or Inbox settings.
Step 4: Set up tickets
Next you need to configure which tickets will be visible in the Customer Portal. Only tickets that match selected ticket property filters here will be shown to customers logged into Customer Portal.
We recommend thinking about the following:
- Ticket pipeline - Do you only want to show support tickets?
- Create date - Do you only want to show tickets created in the last 30 days?
- Ticket status - Do you want to exclude any closed tickets?
- Ticket permissions - Do you want to only show tickets associated with the contact or do you want to show all tickets, including ones associated with the company?
These can all be set up in the Customer Portal > General.
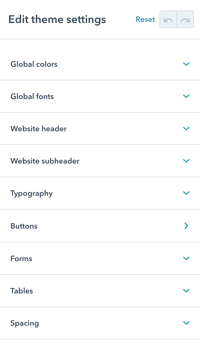
Step 5: Select branding
You need to ensure your Customer Portal is seamless with your website to provide a consistent experience to your user.
- Head to your Customer Portal
- Select Template
- Choose between your ticket listing page or your ticket detail page
- Select edit
- Use Theme Settings on the left hand side to align the portal with your website branding
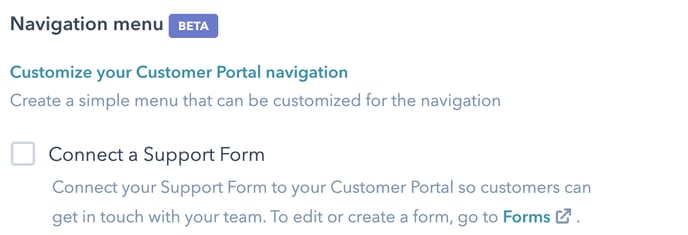
Within your Customer Portal, you can also decide on which navigation you'd like and insert a support form which will help your customer get in touch with you if they have any queries.
Step 5: Add customer portal to knowledgebase
By ensuring your internal linking is set up properly, you'll be giving your customer everything they need to successfully self-serve. Connecting your knowledge base and Customer Portal is one such way:
- Head to to Service > Knowledge Base
- Click Customize template
- Select Navigation bar
- Click to toggle the Show Customer Portal link ON
To make sure you can access your knowledge base from your Customer Portal simply follow these steps:
- Click on Service > Customer Portal
- Select Customise your Customer Portal navigation
- Update useful links with the correct link
Step 6: Press go!
Now that branding, permissions and settings have all been configured you're ready to set your customer portal live by clicking View Customer Portal switch ON. You can now send customers a link or they can find it via the Knoweldge Base
