HubSpot has a good way of segmenting your contacts based on engagement but if you want a smarter way, look no further than Seventh Sense. Their AI automatically looks at your audience and puts it into engagement-level categories.
1. The engagement categories
- Active - The best kind of people! These are actively engaged with your emails so keep doing what you're doing.
- Evaluating - These are contacts that the AI isn't sure about yet. They are building a baseline so continue to send emails to these people to generate data that the tool can use.
- Passive - Uh oh, these are the people starting to fatigue. Try sending fewer emails to these kinds of people unless it's super relevant.
- Inactive - Suppress, suppress, suppress. These people do not want to hear from you so the more emails you send, the more your reputation hurts.
2. Create the emails
Now you understand the different categories, you'll need to build out four different versions of your email. Make sure to change the language of the email and subject line to really target the different levels of engagement.
For example:
- <email name> - Evaluating
- Don't overthink, just create the email as your ordinarily would.
- <email name> - Active
- "Recommended reading based on what you like" - Let them know their activity can provide them with value.
- "Thanks for your feedback" - Everyone likes to feel appreciated!
- <email name> - Passive
- "Tips to help [pain point]" - Use industry/job title pain points to really get their attention.
- "We wrote this just for you, [Personalisation - first name/company name]" - Make them feel special!
- <email name> - Inactive
- A re-engagement campaign is the only time you should be contacting these people.
 3. Create the workflow
The first step is to create a workflow that centres around a specific date that you'd like this email to send. When it comes to the trigger, we recommend using an active list that you've already created.
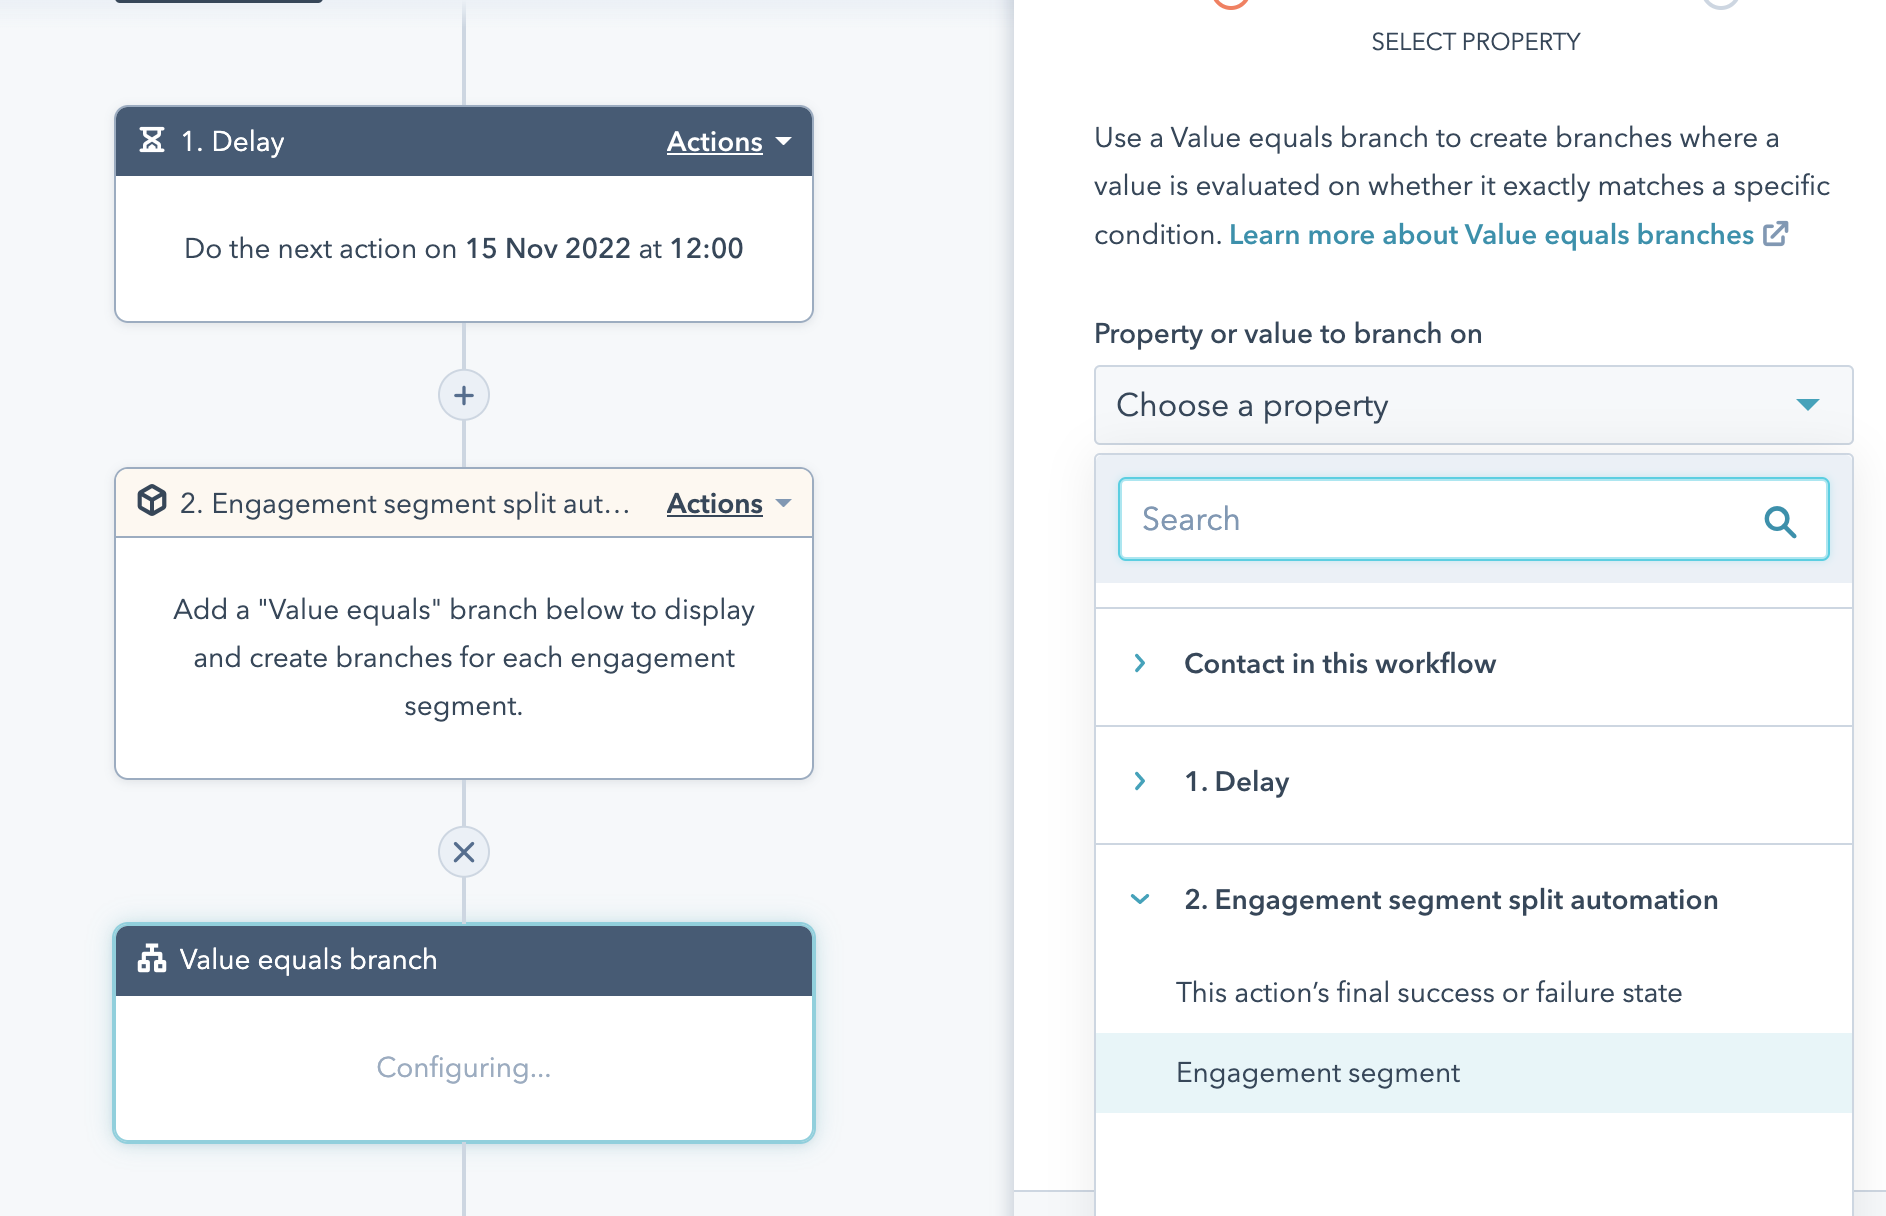
Add the workflow action "Engagement segment split" as the next step with a "Value equals branch" underneath that. When choosing a property for this branch, make sure that you select "Engagement segment split" and then "Engagement Segment". Remember: to tick the box that makes a branch for each value.
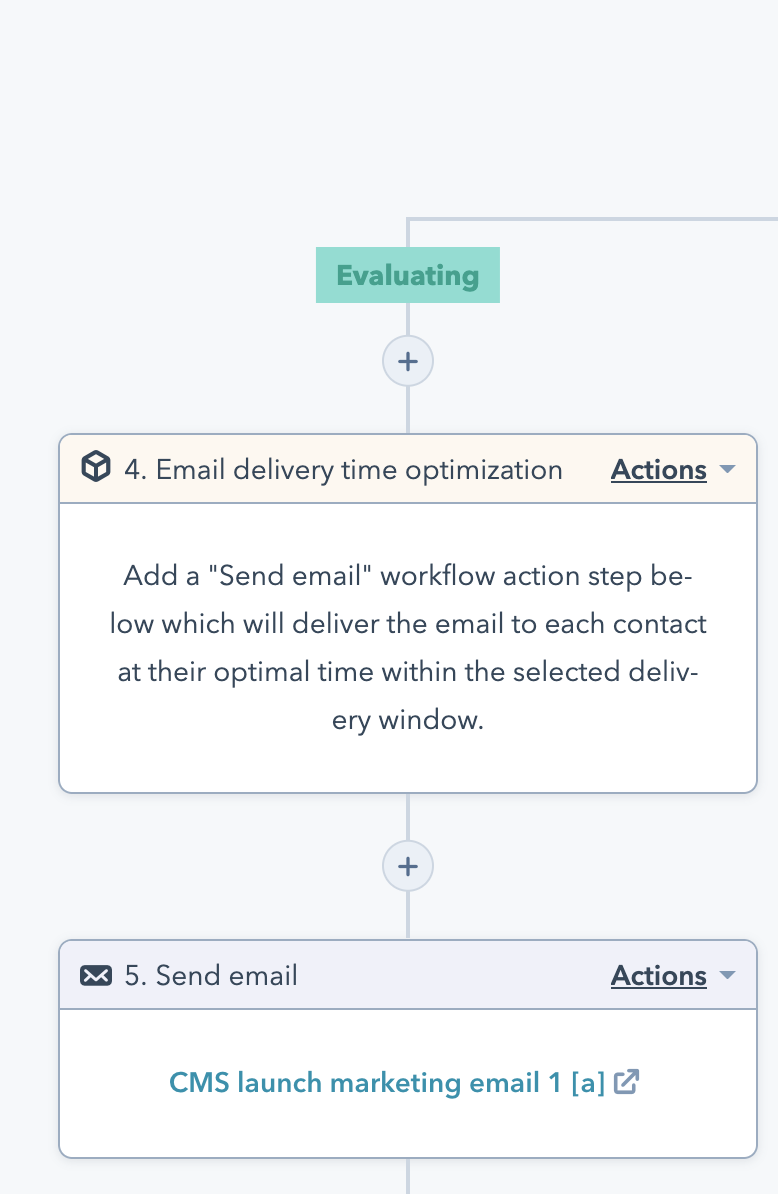
From here you can either send the emails as normal by adding them to each branch or add in a delivery time optimization action and then the email.
By adding in the delivery time optimization, you're sending the email at the most optimum time for each contact.
Repeat your choice under each branch until each segment has a corresponding email.
And now you can publish your workflow!

Author: Bridget Reid
Principal Marketer
