There are lots of ways to manage send lists and subscribers in HubSpot - so much so that people often avoid using the built-in tool to manage subscriptions because it looks a little complicated - preferring to use lists and workflows instead. But the subscriptions tool really is the best way to ensure your send lists stay organised, and ensure that your contacts only get the emails they want to receive.
1. Set up the subscriptions
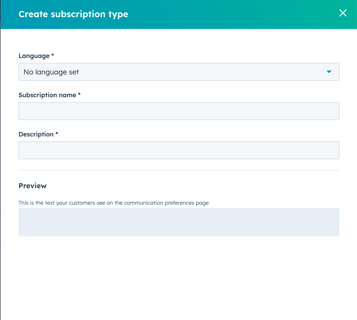
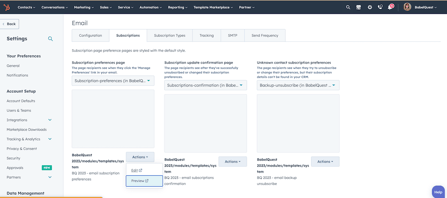
First step is the easiest, so head over to your settings > marketing > email and you will see the subscription tab. In there you can manage and create new ones. It's simple, select a language, name it and a short description about what people who have opted in will be signing up for. This is what will show on your preferences page.
2. Opt your old lists into these subscriptions
If you're like us and had about half a dozen lists you were sending to then they will need subscribing to the shiny new subscriptions you set up a few minutes ago. Now this is easier than it sounds there's no longwinded way to go around it, just a few clicks of a button and you are sorted.
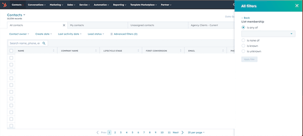
Head over to contacts in your portal, here you will simply filter the contacts by the lists you want to subscribe.
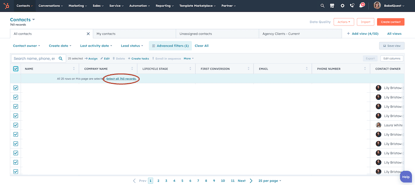
Make sure to select all contacts with this handy button. I managed to miss it first time and wondered why I had 25 people in each subscription. Thanks, Gem!
Once you have selected everyone then simply just click more and select the subscriptions you want them in and voila! Simple as that. 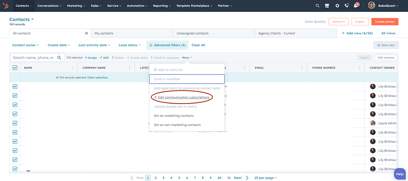
3. It's all about management
There are a few house keeping rules you need to do to make sure your subscriptions stay clean.
Personalise your subscriptions page.
HubSpot creates a subscriptions page by default which you can add to the bottom of your emails but majority of the time they are bland and can look polar opposite to your website. You may need a CMS wizard to do this for you but it shouldn't take too long.
Delete your old set-up
There really is nothing worse than a cluttered portal, so it's only good practice to delete the old set up of workflows, lists and everything else in between which will leave you fresh and ready for the future of simple subscriptions.
Have people that aren't opening or clicking through?
There are always people you will send to that won't open and you don't want them constantly bogging down your email health. The best way to do handle these people is to send a simple email allowing then to adjust their preferences. This is easy; you create your lists based off of subscriptions, opens in the last X amount of weeks/months and if they fit the criteria simply send them an automated email to nudge them in the right direction.
Finally, forms.
If you have any forms that you may have used to enroll people into your old system of lists, you're going to have to change that slightly.
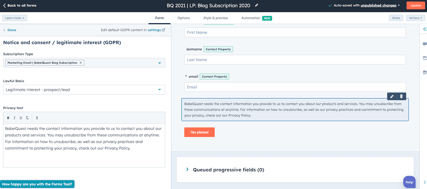
This is a really simple step, you don't need to change the form massively but you will need to add in a legitimate interest or tickbox to your forms. Here is how you should approach a normal form and a pop-up form.
For the pop-up form you want to head to the form section and add in a legitimate interest. In this section you will then be able to edit which subscription the form is intended for. Once you have amended this and tweaked the wording to suit your needs then hit save!
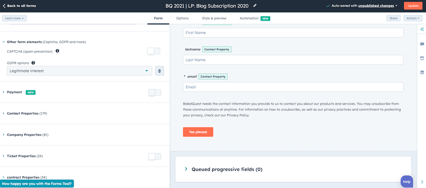
Similar for the regular form, head over to the other form elements and you will find what you need in there to set your form up to manage everything correctly.
Subscriptions may seem like a bit scary task, trust me I have been there! But in reality once you get your hands on it, you will realise that it's a fairly simple task and will save you over complicated workflows and lists, keeping your portal squeaky clean.

Author: Mia-Jean Lee
Digital Marketing Executive
