HubSpot Email: How to use 'Related Content' Modules with smart content
You know how to create a programmable email module now, but do you know how use it with smart content to maximise its potential?
We love the 'Related Content' module our developer Justyna created for us. If you (or your own developer) haven't read it, then take a peek at here.
Now, you could just settle for dropping it into your emails and picking an interest area that you think would suit most people receiving it. But that isn't going to generate the most click-throughs. To get people to click, it needs to speak to their own interest area.
It might sound like that would take a lot of work - but luckily, using a combination of HubDB and smart content, it's pretty simple once the initial setup is complete!
Get started with HubDB
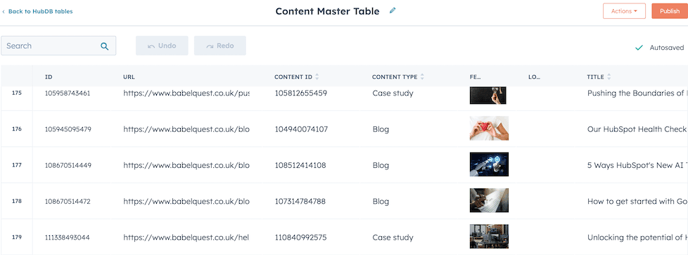
To get started, you'll have to have a HubDB table containing the content you want to showcase. Make sure you have columns containing all the information your developer can create the module with. This is where you will keep the module up to date by entering recent content. Here's our master content table for a bit of inspiration.
Where's the module?
The first thing I had to think about was where was I going to put the module, think about the emails you send to your database that receive the best stats. That way you know the hard work your putting in will be paying off.
For example, our top performing emails are our monthly HubSpot product updates, weekly HubSpot Hack newsletters and the follow-up emails sent to people downloading our resources. You could put it anywhere, as long as it doesn't distract from any higher-priority CTAs.
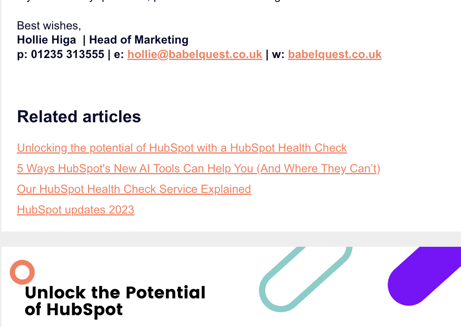
Let's make it personal.
As mentioned, if you want to really make the most of this, you want to get the 'Related articles' to pull up content that is of interest to that specific contact. To do that, you need to...
Start with lists.
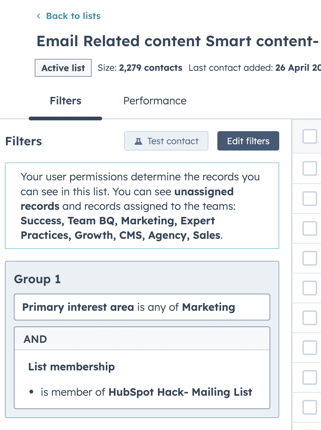
You want to head to lists and create a list for each interest area you have, this is needed for the smart content module later. How you do this will vary on how you set your interest areas - we have a 'Primary interest area' custom field, and we create a list for each primary interest area.
It's time to get smart
Once you have sorted the lists, it's time to set up the smart content variations. Click on the module to turn it into a smart module and then filter this by your lists.
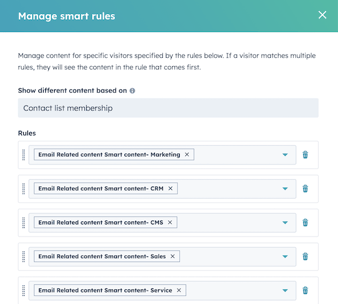
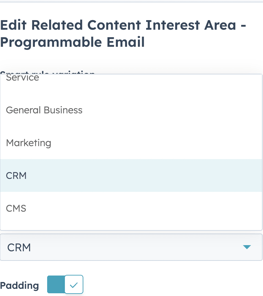
Once you have done this then you can edit what content each smart list gets displayed.
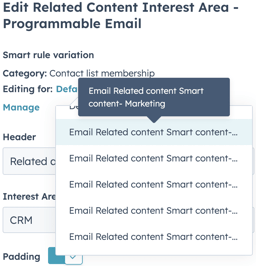
Once you have selected the interest are in your module, publish and you are ready to go!
Is it customisable?
There is a big of scope with how you want the text to display, Justyna very kindly changed the font colour and underlined the links. So you can change what colour you want your module to be, the text and if it displays as bullet points or not.
It's your module, have fun with it! Create your own module and start channeling the power of personalisation into your emails.

Author: Mia-Jean Lee
Digital Marketing Executive

