Having a hard time using native HubSpot Marketing Events? This app allows you to create events directly in HubSpot, and register contacts for those events with an easy to use workflow action.
This app adds a contact-based workflow action to update the status of the given contact to either Registered, Attended, or Cancelled. This gives you complete control for deciding how to manage event status updates.
Step 1 - Install the Marketing Event Management App
In your HubSpot portal go to the app marketplace and search for Marketing Event Management and hit install.
Step 2 - Create your marketing event
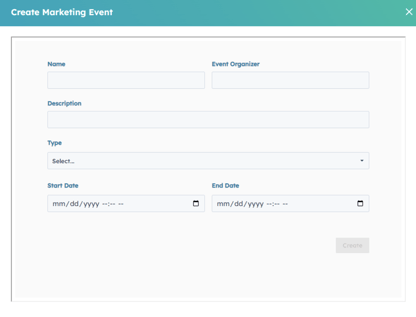
Once the app has been installed, click on your connected apps, open the Marketing Event Management App > Settings and then > Create new marketing event. A pop up box will appear which you will then be able to enter the details of your marketing event.
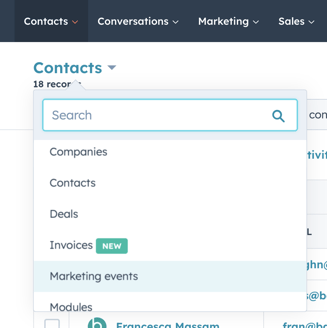
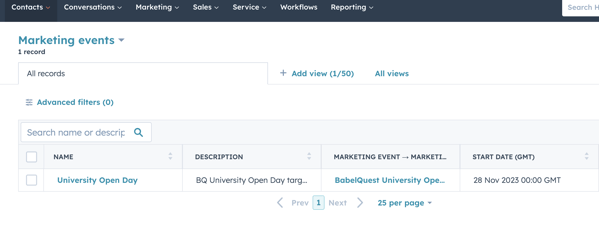
 Once your event is created, the next step is just as straightforward. Head over to the "Contacts" section and navigate to the dropdown box. Select "Marketing Events" from the options available. This action opens up a seamless pathway, guiding you directly to the events you've created.
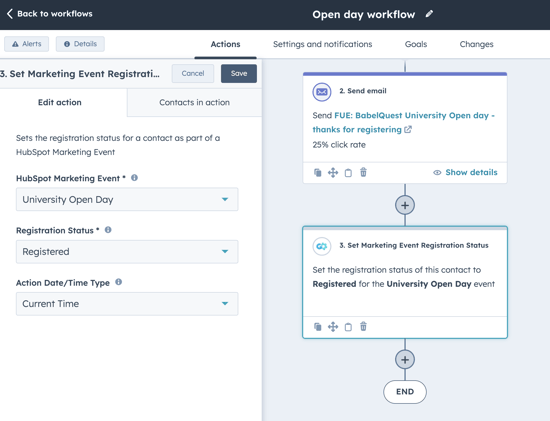
 Step 3 - Updating Contacts Registration Status via Custom Workflow Action:
Navigate to the top navigation bar, click on "Workflow," and select "Create New Contact-Based Workflow."
For the contact enrollment trigger, opt for "Form Submission" and pick the designated registration page. Click the "+" symbol to add an action of your choice. Top tip: We recommend sending a Follow-Up Email (FUE) as a prompt response immediately after the form submission.
Now it's time to add the Marketing Event App.
Click the "+" symbol to add an action, scroll to the bottom of the menu, and choose "Set Marketing Event Registration Status."
Step 4. Manually update to Attended status
How you document attendees is subject to the event you are managing. In some cases you might ask them to fill out a form on the day as a register, in which case you can repeat step 3 and change the final step to be "Attended".
However, there may be cases where you need to manually change a status. To do this, head to contacts in the top navigation bar and select the contact record that you wish to change the contact record for. On the right hand side module click "Set registration status" and select the option you require.

By using this feature, you gain the ability to efficiently set registration statuses for individual contacts. Whether you need to update them to "Registered," mark their attendance, or cancel their registration, you have the precise control you need.
