In order to maintain and reinvigorate your relationship with your database, you need to do regular re-engagement campaigns. Base them on your contact's engagement status to increase brand loyalty, decrease churn and drive more sales. Follow the below process to start sending your re-engagement email campaigns via HubSpot.
1. Identifying who is un-engaged
Start by creating a list of all your unengaged contacts. This will look completely different depending on your business, that's why we've created a range of criteria below:
- Has received over 10 marketing emails and has never opened any
- Has received over 10 marketing emails and has not clicked on any
- Has not opened any marketing emails in the last 3 months
- Has not ever visited the website
- Has not ever purchased anything
2. Creating the emails
Make your emails as you normally would, ensuring they are tagged as automated and set live. Again, this will depend on your business but we recommend not just sending one "blast" but rather a slow trickle of communication over a few weeks. We see great success with re-engagement campaigns that contain 3-5 emails. Some topics to cover and consider are:
- Updating their email preferences - Ask them to submit their preferences rather than opt out completely
- Ask for feedback - Send over a survey button to ask them what they'd love to read about so you can personalise future email communications
- Offers - Give them an incentive by offering a discount for re-opting in to your email marketing communications
- Talk like a human - Don't make the mistake of being a robot in your campaign. Use emotional messaging to let the contact know that you'll miss them and try and persuade them back.
- A sense of urgency - Give them a deadline and let them know they'll be removed if they do nothing
Top tip: Make it super easy for them to stay opted in by using a button in the email.
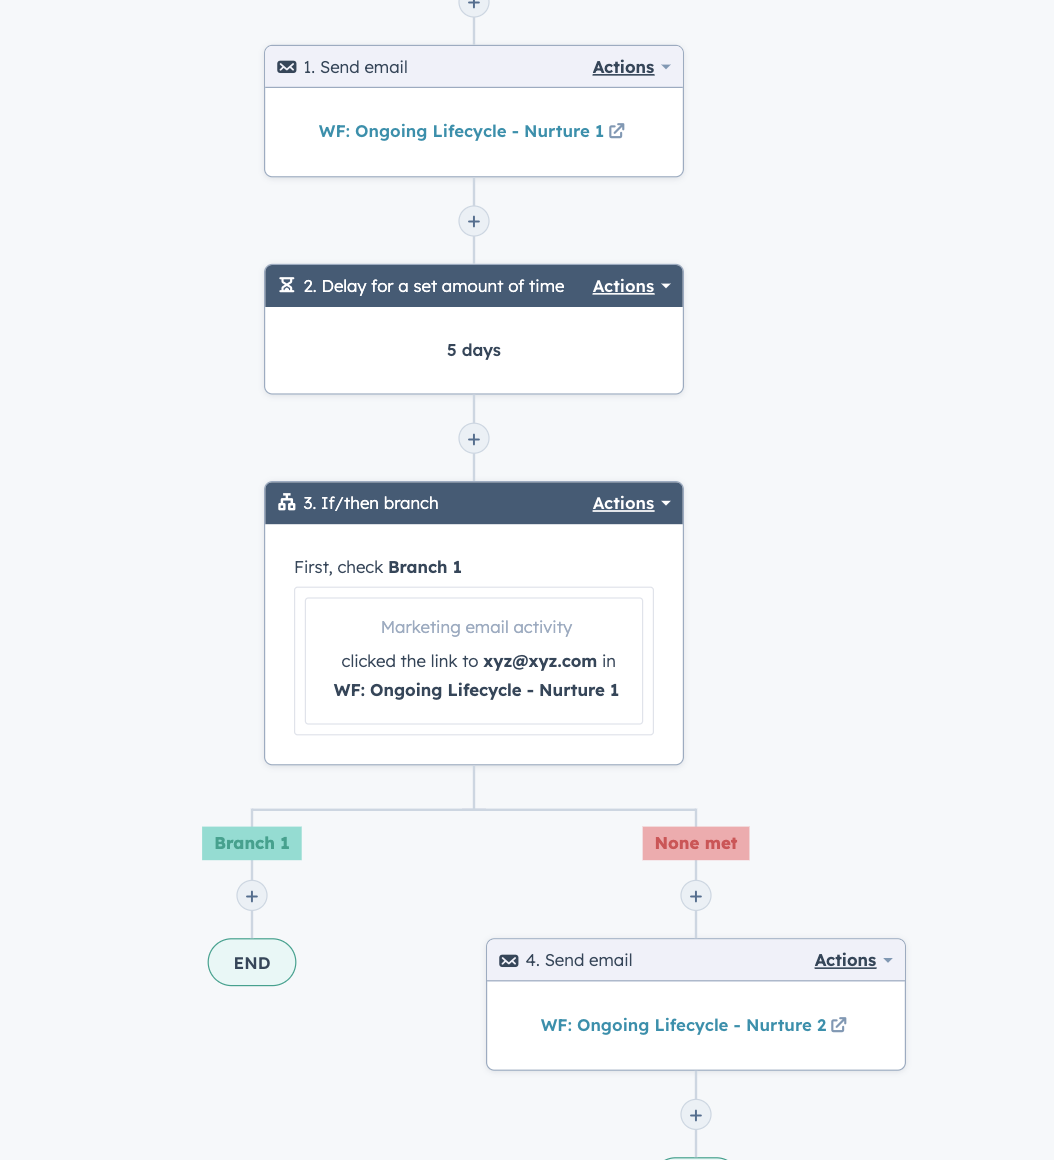
3. Creating the workflow
- Go to workflows > create workflow > from scratch
- Select contact based > blank workflow
- Set up triggers based on unengagement criteria, or if you have made this via a list then select the list
- Click send email as an action and select Email 1
- Add a delay
- Repeat
Top tip: Make sure you add some 'if/then branches' to ensure the emails are only being sent to people who haven't engaged

Author: Bridget Reid
Principal Marketer
