Chatbots are great for answering frequently asked questions and routing visitors through to the right place so they can get the information they need, as quickly as possible. But what about using chatbots to nurture a live conversion to provide even more value straight after they've downloaded something?
This hack will show you how and when to use chatbots to do this.
1. Create a conversion page and thank you page
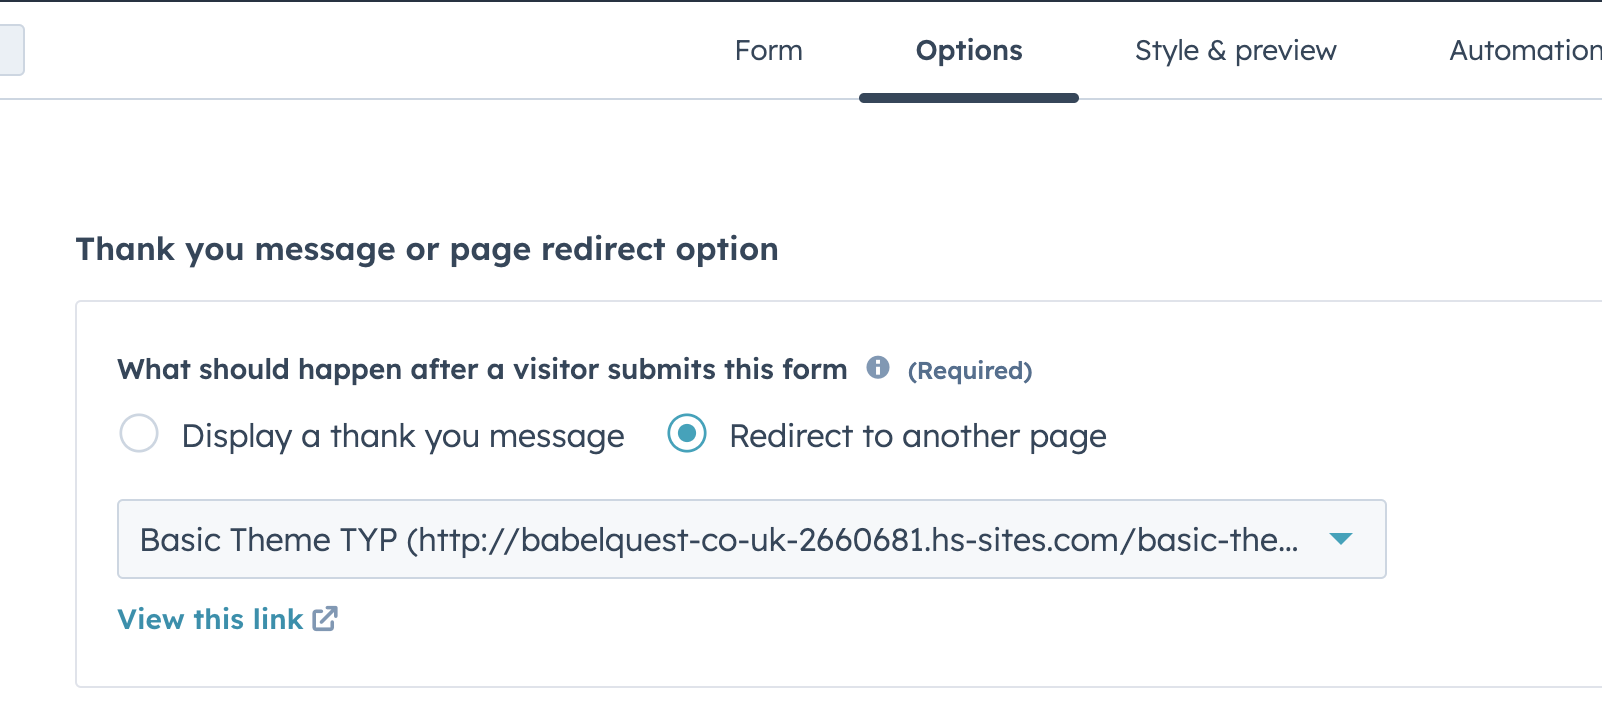
This can be an existing guide, download or anything else you have on your website that means visitors need to fill in a form. The important thing here is that you need the form on the conversion page to direct to a thank you page and not an inline thank you message.
To do this go to the forms editor and find the form you're using on that conversion page. Click edit > options > redirect to thank you page > select URL.
2. Create your chatbot
- Go to Conversations > Chatflows > Create chatflow
- Select Website > Start from scratch
- Personalise welcome message - This is important and will be bespoke to the landing page you are creating. For example, if you have a guide on recycling your message would be "Got a question about recycling? We can help!" or "Do you want help finding more recycling resources? I can help."
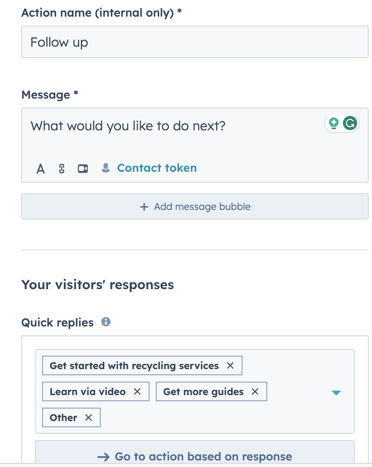
- Create your follow up message which is usually "What would you like to do next?" as well as some quick replies to route them to the information they need - Using the example above we would use "Get started with recycling services", "Get more recycling resources", "Learn via video" and "Other"
- Click "go to action based on response"
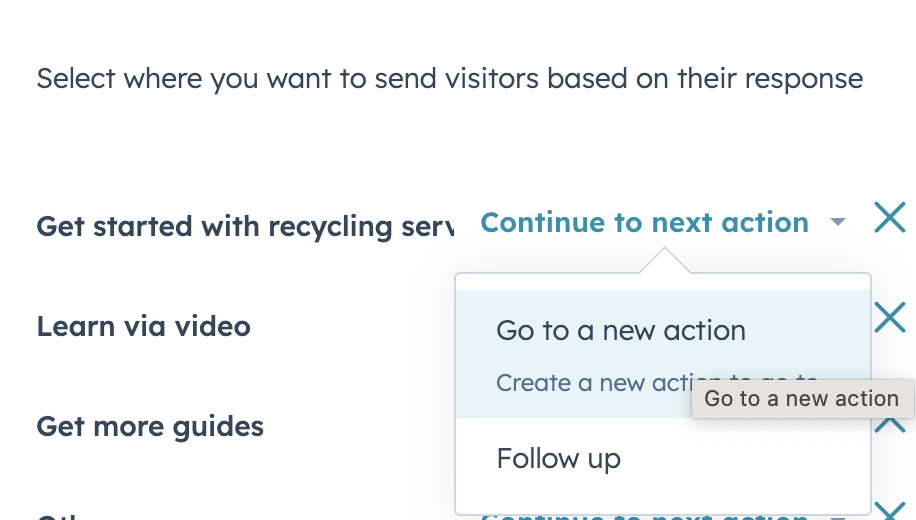
- Click on each response and hover over 'Continue to next action' and change to 'Go to new action'
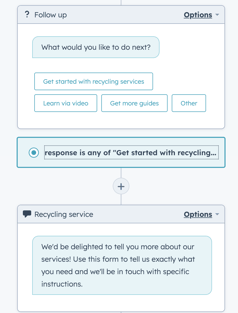
- Select relevant message type, for this we will send a simple message that lets them know where the form is to request a service.
- Once saved, this will appear as an option on the main screen, as you can see:
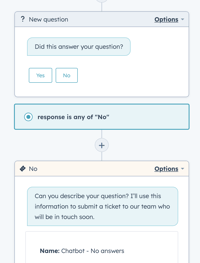
- We would then continue adding variations to the message until all possible questions are answered.
- For each question, add an option to ask them if that answered their question and if it didn't then route them through to the ticketing form.
3. Set your chatbot live
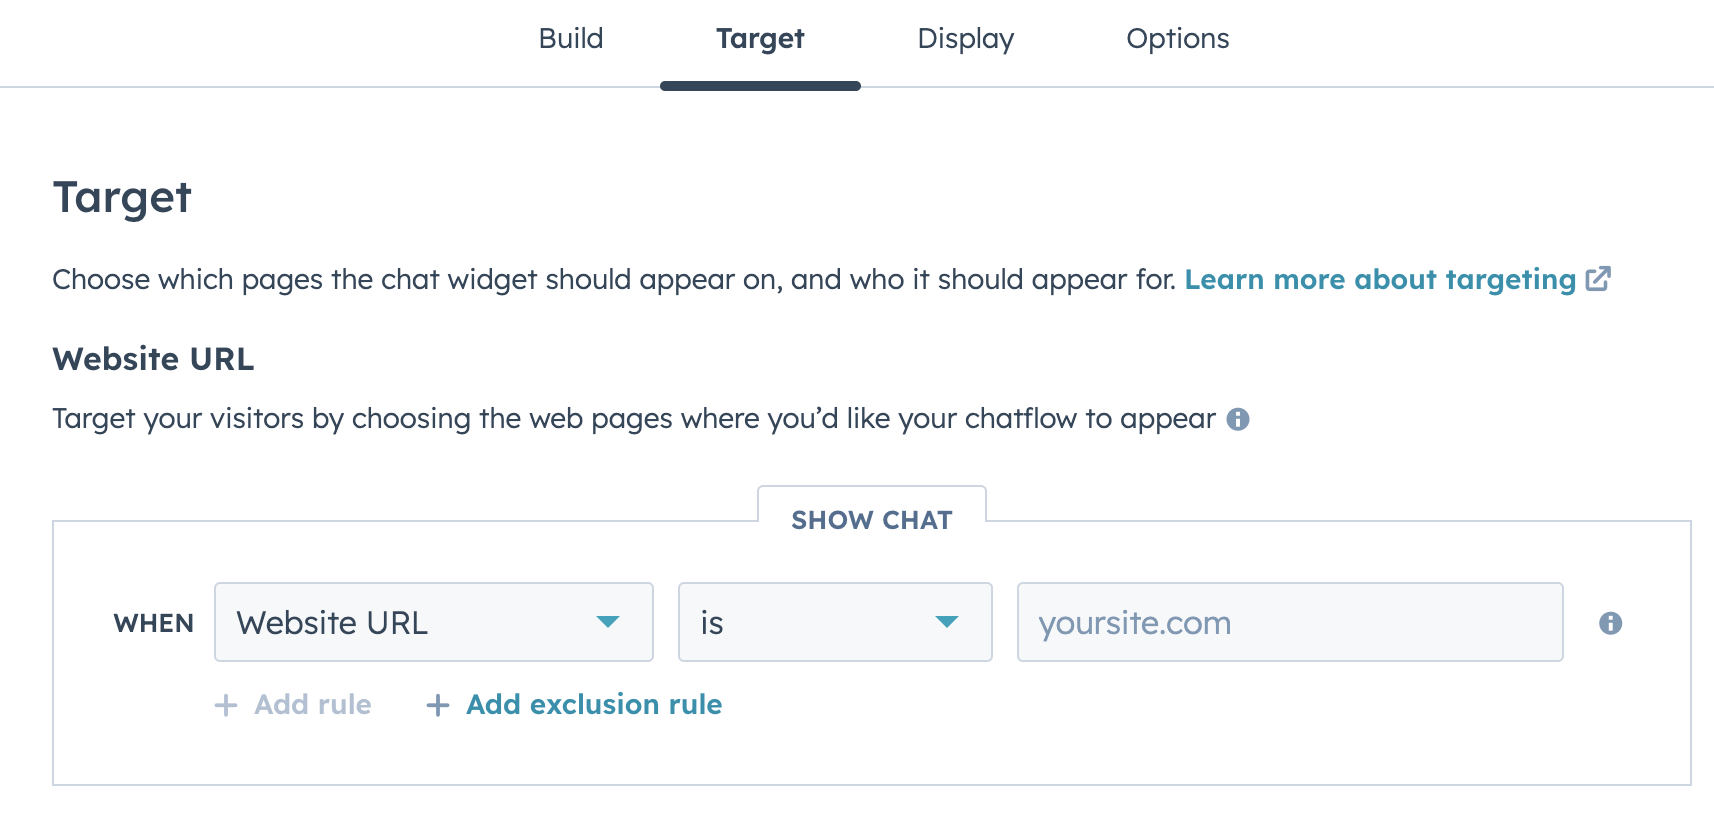
Once you're happy with your chatbot and think it has answered all the questions someone might have on this page, it's time to go live! Click Target and add the URL of your thank you page
4. Analyse
Remember to keep analysing the performance of the chatbot to check if any more FAQs come up which you've missed.

Author: Bridget Reid
Principal Marketer
